
There’s a special kind of magic that happens around a campfire at night. The stars are out, the fire is crackling, the smell of woodsmoke hangs in the air — and someone pulls out chocolate and marshmallows. Suddenly, everyone’s leaning in.
Dessert at a campsite isn’t just about satisfying a sweet tooth. It’s about that shared moment after a long day of hiking, swimming, or exploring — when you slow down, sit close together, and enjoy something warm and delicious. The good news? You don’t need a full kitchen to pull off an impressive camping dessert. All you need is a little prep, the right ingredients, and one of these 15 foolproof ideas.
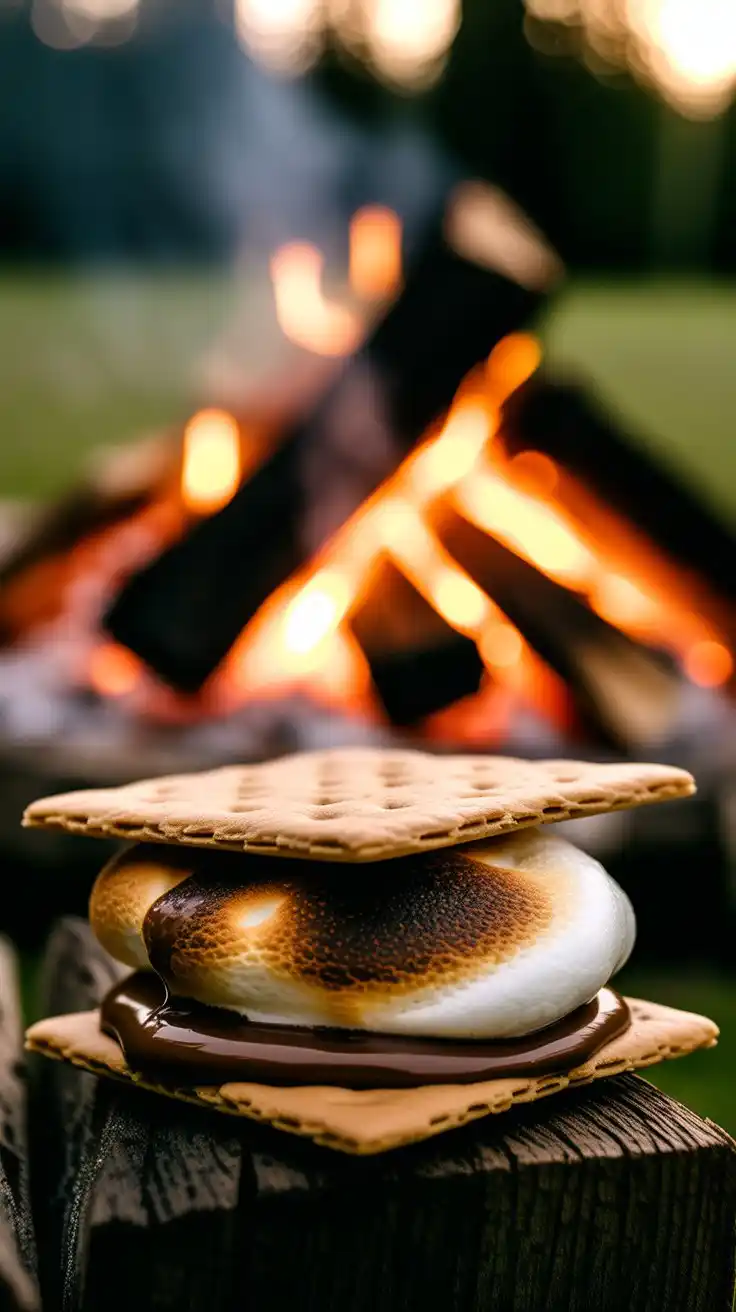
Classic Campfire S’mores
Let’s start with the one that started it all. S’mores are the undisputed king of camping desserts, and for good reason — they’re simple, interactive, and absolutely irresistible. The combination of crunchy graham crackers, melted chocolate, and a perfectly toasted marshmallow is one of those rare things that never gets old.
The beauty of s’mores is how customizable they are. Swap out the classic chocolate bar for a peanut butter cup, a caramel square, or even a piece of dark chocolate with sea salt. Use flavored marshmallows or try cookie butter instead of plain crackers. Every variation feels like a discovery.
Serves: 4 | Cook Time: 5 minutes
Ingredients
- 8 graham cracker squares
- 4 large marshmallows
- 2 chocolate bars (broken into 4 pieces each)
- 4 long roasting sticks
Instructions
- Push one marshmallow firmly onto the tip of each roasting stick.
- Hold the marshmallow about 6 inches above the campfire coals, rotating slowly and evenly.
- Toast for 1–2 minutes until the marshmallow is deep golden brown on all sides and soft throughout.
- Place one piece of chocolate on a graham cracker square.
- Slide the toasted marshmallow off the stick onto the chocolate using the second graham cracker.
- Press gently and hold together for 10 seconds so the heat of the marshmallow melts the chocolate.
- Eat immediately while warm and gooey.
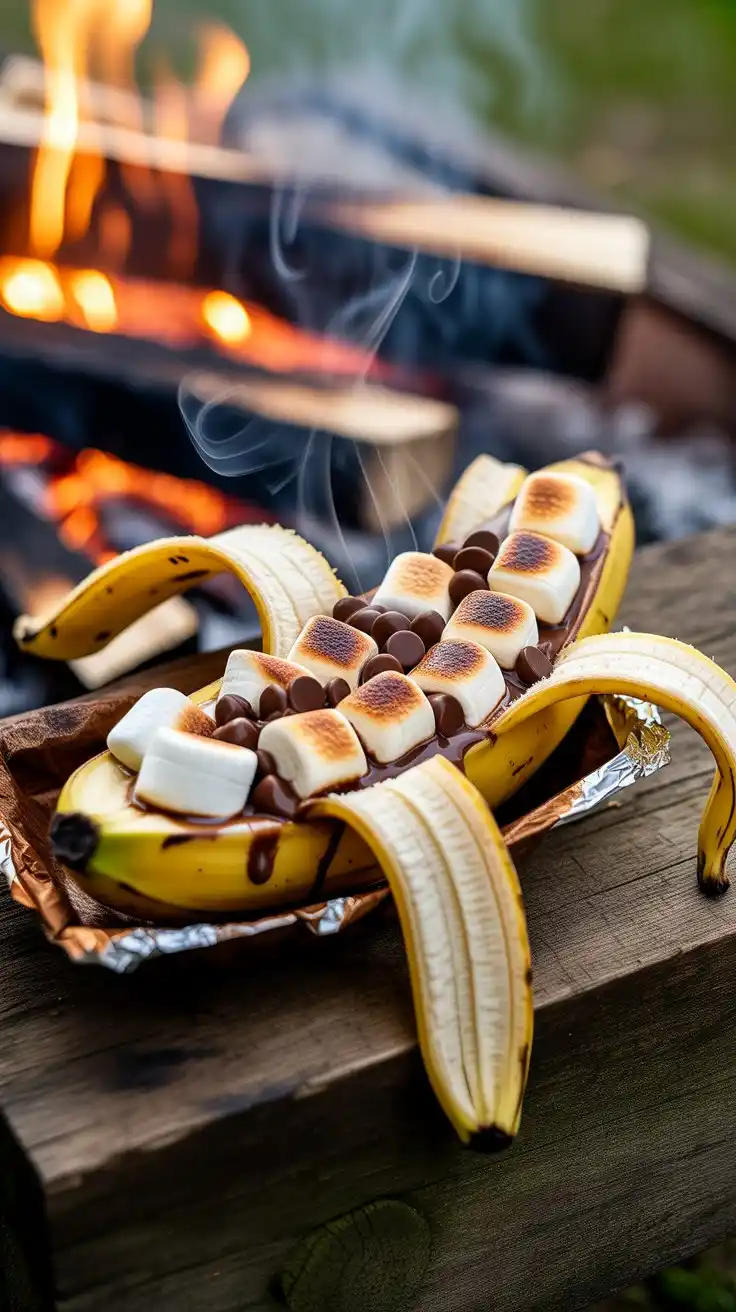
Banana Boats
If s’mores are the king, banana boats are the fun, laid-back cousin everyone loves. You take a whole banana, slice it open without removing the peel, stuff it with chocolate chips and mini marshmallows, wrap it in foil, and toss it into the campfire coals. What comes out 10 minutes later is a warm, gooey, self-contained dessert that you eat straight from the peel.
Kids go absolutely wild for these, and adults secretly love them just as much. You can get creative with toppings — crushed graham crackers, peanut butter chips, caramel bits, or coconut flakes all work beautifully.
Serves: 4 | Cook Time: 8–10 minutes
Ingredients
- 4 ripe bananas (unpeeled)
- ½ cup mini marshmallows
- ½ cup chocolate chips
- ¼ cup crushed graham crackers (optional)
- 2 tablespoons caramel bits or peanut butter chips (optional)
- Heavy-duty aluminum foil
Instructions
- Without removing the peel, slice each banana lengthwise along the top curve, cutting nearly through to the bottom peel but not all the way.
- Gently open the slit with your fingers to create a pocket inside the banana.
- Fill each banana pocket with chocolate chips, mini marshmallows, and any other toppings you like.
- Press the peel closed as much as possible, then wrap each banana tightly in a sheet of heavy-duty foil.
- Nestle the foil packets directly into hot campfire coals.
- Cook for 8–10 minutes until the fillings are melted and the banana is soft.
- Remove with tongs, unwrap carefully (steam will escape), and eat with a spoon straight from the peel.
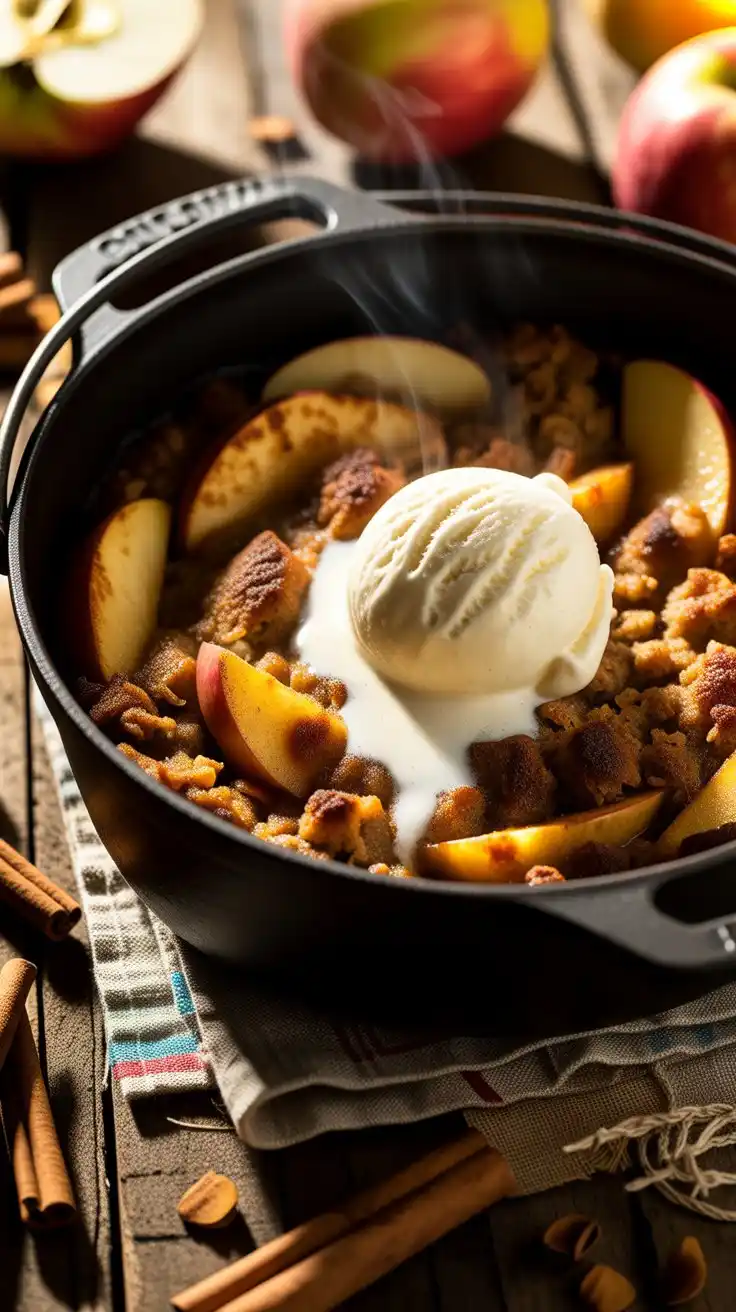
Dutch Oven Apple Crisp
This one feels like a warm hug. Dutch oven apple crisp is what you make when you want a real dessert — something that smells incredible, fills the camp with the scent of cinnamon and baked fruit, and earns genuine compliments from everyone at the site.
The Dutch oven does all the heavy lifting. You layer sliced apples on the bottom, cover them with a buttery oat crumble, and let the coals do their work. After about 35 minutes, you lift the lid to reveal something that looks and tastes like it came straight out of a farmhouse kitchen.
Serves: 6 | Cook Time: 35–40 minutes
Ingredients
For the apple filling:
- 6–8 medium apples, peeled, cored, and sliced
- 2 tablespoons lemon juice
- 3 tablespoons granulated sugar
- 1 teaspoon cinnamon
For the crumble topping:
- 1 cup rolled oats
- ½ cup all-purpose flour
- ½ cup packed brown sugar
- 1 teaspoon cinnamon
- ¼ teaspoon nutmeg
- ½ cup (1 stick) cold butter, cubed
- Pinch of salt
Instructions
- Lightly grease the inside of your Dutch oven with butter or cooking spray.
- Toss the sliced apples with lemon juice, granulated sugar, and cinnamon in a bowl, then pour them evenly into the Dutch oven.
- In a separate bowl, combine oats, flour, brown sugar, cinnamon, nutmeg, and salt.
- Add the cubed cold butter and use your fingers to rub everything together until the mixture resembles coarse crumbs.
- Scatter the crumble topping evenly over the apples.
- Place the Dutch oven over a bed of hot campfire coals. Carefully set additional hot coals on top of the lid to create top-down heat.
- Bake for 30–40 minutes, checking occasionally. The crisp is ready when the apples are bubbling at the edges and the topping is deep golden brown.
Remove from coals, let sit for 5 minutes, and serve warm.
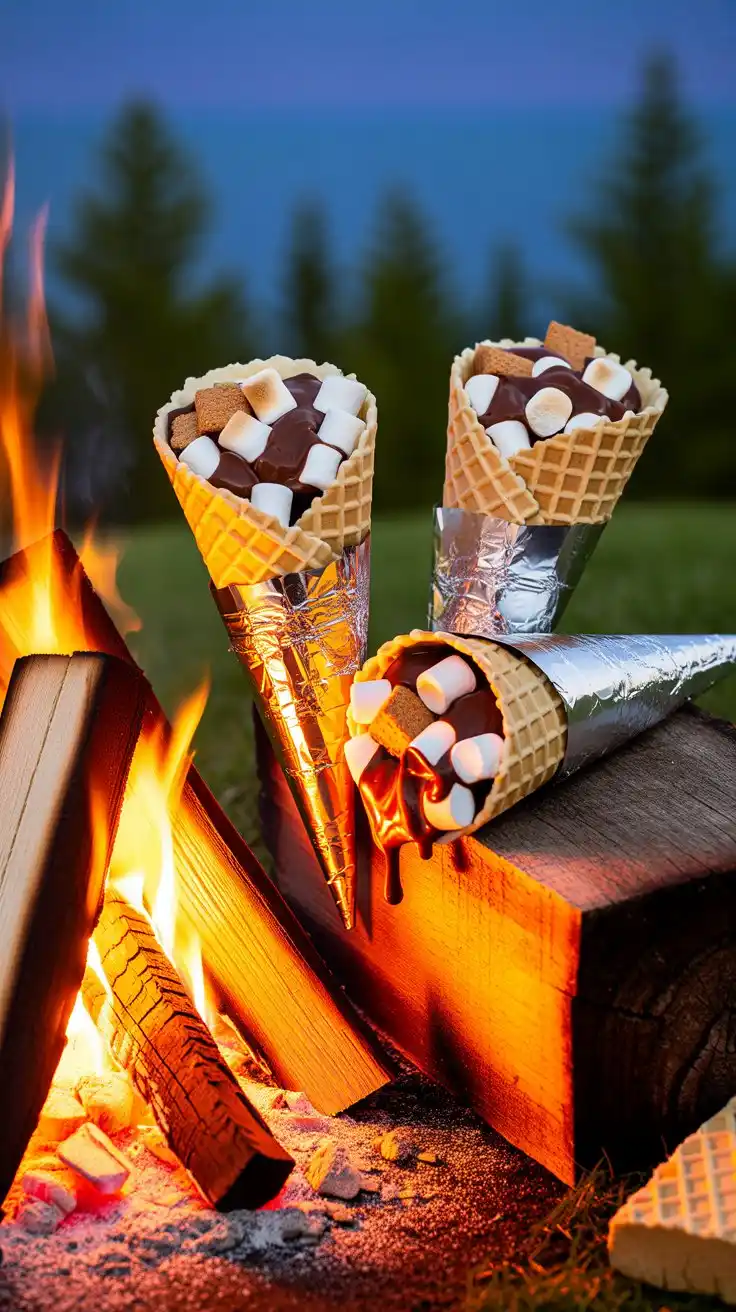
Campfire Cones
Think of campfire cones as s’mores 2.0. Instead of sandwiching everything between crackers, you fill a waffle cone with all your favorite toppings, wrap it in foil, and heat it over the fire. The cone gets slightly crispy on the outside while everything inside melts together into a warm, scoopable treat.
The best part? Every person gets to build their own. Set out bowls of toppings and let everyone fill their cone however they like. Chocolate chips, marshmallows, peanut butter cups, crushed cookies, banana slices, caramel — all fair game.
Serves: 4 | Cook Time: 5–7 minutes
Ingredients
- 4 waffle cones
- ½ cup mini marshmallows
- ½ cup chocolate chips
- ¼ cup peanut butter chips or butterscotch chips
- ¼ cup chopped banana or strawberry slices (optional)
- ¼ cup crushed cookies or graham crackers (optional)
- Heavy-duty aluminum foil
Instructions
- Set out all your toppings in small bowls so everyone can customize their cone.
- Fill each waffle cone with a mix of marshmallows, chocolate chips, and any other chosen toppings. Pack them in gently but fill the cone generously.
- Wrap each filled cone tightly in a double layer of heavy-duty aluminum foil, sealing the open end closed.
- Place the foil-wrapped cones near (not directly in) campfire coals, laying them on their side.
- Heat for 5–7 minutes, using tongs to rotate them every 2 minutes so they heat evenly.
- Unwrap carefully — the cones will be very hot and steam will escape.
- Eat with a small spoon and enjoy immediately.
Grilled Fruit Skewers with Honey Drizzle
Not every camping dessert needs to be rich and heavy. After a big meal around the fire, sometimes what you want is something lighter — and grilled fruit skewers deliver exactly that.
When fruit hits a hot grill or grate, something beautiful happens. The natural sugars caramelize, the edges char slightly, and the flavor becomes more concentrated and complex. Pineapple, peaches, strawberries, and banana are all ideal candidates. A drizzle of honey or maple syrup on top takes them over the edge.
Serves: 4 | Cook Time: 6–8 minutes
Ingredients
- 1 cup fresh pineapple chunks
- 1 cup strawberries, hulled
- 2 bananas, cut into thick slices
- 2 peaches, pitted and cut into cubes
- 2 tablespoons honey or maple syrup
- 1 tablespoon brown sugar
- ½ teaspoon cinnamon
- 8 wooden skewers (soaked in water for 30 minutes before use)
Instructions
- In a small bowl, mix brown sugar and cinnamon together.
- Thread the fruit pieces onto the soaked skewers, alternating varieties for color and variety.
- Lightly dust the fruit skewers with the cinnamon-sugar mixture.
- Lay the skewers on a campfire grill grate over medium-heat coals.
- Cook for 2–3 minutes per side, turning once, until the fruit is lightly charred and caramelized.
- Remove from heat and arrange on a plate or serve directly on the skewers.
- Drizzle generously with honey or maple syrup and serve warm.
Cast Iron Skillet Cookie
A giant, warm cookie baked in a cast iron skillet over a campfire sounds like something from a dream — but it’s completely achievable at your campsite. The cast iron distributes heat evenly, giving you crispy edges and a soft, gooey center that you scoop and share like a communal dessert.
Bring pre-made cookie dough from home (store-bought works perfectly here) and press it into the skillet. Cover with foil and cook low and slow. The result is somewhere between a cookie and a brownie, and it disappears fast.
Serves: 6–8 | Cook Time: 18–22 minutes
Ingredients
- 1 package (16 oz) pre-made chocolate chip cookie dough (or homemade, chilled)
- ½ cup extra chocolate chips
- 2 tablespoons butter (for greasing the skillet)
- Optional mix-ins: chopped nuts, caramel bits, M&Ms, Reese’s Pieces
Instructions
- Grease a 10-inch cast iron skillet generously with butter, coating the bottom and sides.
- Press the cookie dough evenly into the skillet in a single layer, spreading it to the edges.
- Scatter extra chocolate chips and any optional mix-ins over the top, pressing them lightly into the dough.
- Cover the skillet tightly with a sheet of heavy-duty aluminum foil.
- Place the skillet over medium-low campfire coals — not directly over flames, which will burn the bottom.
- Cook for 18–22 minutes without lifting the foil. The cookie is done when the edges are golden and set but the center still looks slightly underdone.
- Remove from heat and let rest, still covered, for 5 minutes — the residual heat will finish the center.
- Scoop and serve directly from the skillet with spoons.
Campfire Peach Cobbler
Peach cobbler has been a campfire tradition for generations, and one bite explains why. Juicy, sweet peaches bubbling under a golden biscuit topping — it’s comfort food at its finest, made entirely outdoors in a Dutch oven.
Fresh peaches work great in summer, but canned peaches (drained) are a perfectly reliable option year-round and save you prep time. Either way, serve it warm with a spoonful of whipped cream or a scoop of ice cream if you have a cooler nearby.

Serves: 6 | Cook Time: 30–35 minutes
Ingredients
For the peach filling:
- 4 cups sliced peaches (fresh or canned, well drained)
- ¼ cup granulated sugar
- 1 teaspoon cinnamon
- 1 tablespoon lemon juice
- 1 tablespoon cornstarch
For the biscuit topping:
- 1 cup biscuit mix (such as Bisquick)
- 3 tablespoons granulated sugar
- ⅓ cup milk
- ½ teaspoon vanilla extract
Instructions
- Lightly grease the inside of your Dutch oven.
- In a bowl, toss peach slices with sugar, cinnamon, lemon juice, and cornstarch until coated.
- Pour the peach mixture into the bottom of the Dutch oven and spread evenly.
- In a separate bowl, stir together biscuit mix, sugar, milk, and vanilla until a thick, slightly lumpy batter forms.
- Spoon the batter in large dollops over the peaches, spreading gently — don’t worry if it doesn’t cover the peaches perfectly.
- Place the Dutch oven over hot campfire coals with additional coals piled on the lid.
- Bake for 30–35 minutes until the biscuit topping is golden brown and cooked through, and the peach filling is bubbling around the edges.
- Remove from coals and let cool for a few minutes before serving warm.
No-Bake Chocolate Oatmeal Cookies
These are the ultimate make-ahead camping dessert. You cook them at home, pack them in a container, and pull them out whenever you need something sweet — no fire required. They’re chewy, chocolatey, and packed with oats and peanut butter, making them surprisingly filling too.
They also hold up well in a cooler or a dry bag, which makes them ideal for backpacking trips or multi-day adventures where you want a reliable dessert without any hassle at camp.

Makes: 24 cookies | Prep Time: 15 minutes + 30 minutes cooling
Ingredients
- 2 cups granulated sugar
- ½ cup whole milk
- ½ cup (1 stick) unsalted butter
- ¼ cup unsweetened cocoa powder
- 3 cups quick-cooking oats
- ½ cup creamy peanut butter
- 1 teaspoon vanilla extract
- Pinch of salt
Instructions
- Line two large baking sheets with wax paper or parchment paper and set aside.
- In a medium saucepan over medium heat, combine sugar, milk, butter, and cocoa powder.
- Stir constantly and bring the mixture to a full rolling boil. Once boiling, cook for exactly 1 minute — no longer — while continuing to stir.
- Remove the pan from heat immediately.
- Quickly stir in oats, peanut butter, vanilla, and salt until everything is fully combined.
- Working quickly (the mixture sets fast), drop rounded tablespoons of the mixture onto the prepared wax paper.
- Let the cookies cool at room temperature for 30–45 minutes until fully set and firm.
- Store in an airtight container. They keep well for up to 5 days at room temperature or longer in a cooler.
Campfire Orange Cakes
This one is as much a campfire experiment as it is a dessert — and that’s exactly why it’s so memorable. You hollow out an orange, fill the peel with cake batter, put the top back on, wrap it in foil, and bake it directly in the campfire coals. The orange peel acts as a natural baking mold and infuses the cake with a gentle citrus flavor.
Kids find this idea completely magical, and honestly, adults do too. It’s the kind of thing that sparks conversation and makes a camping trip feel like an adventure.
Serves: 6 | Cook Time: 15–20 minutes
Ingredients
- 6 large navel oranges
- 1 box yellow or chocolate cake mix
- Eggs, oil, and water as directed on the cake mix box
- Heavy-duty aluminum foil
Instructions
- At home or at camp, prepare the cake batter according to the package directions. Transfer to a sealable container or zip-lock bag for easy transport if prepping at home.
- Cut the top ¼ off each orange to create a lid. Set the lids aside.
- Use a spoon to carefully scoop out all the orange flesh, leaving the peel intact as a cup. (Save the flesh to eat as a snack or squeeze for juice.)
- Fill each orange cup about two-thirds full with cake batter — do not overfill, as the batter will rise.
- Replace the orange lid on top of each filled cup.
- Wrap each orange tightly in a double layer of heavy-duty aluminum foil.
- Nestle the wrapped oranges directly into hot campfire coals.
- Bake for 15–20 minutes, using tongs to rotate them halfway through cooking.
- Remove carefully, unwrap, and test with a toothpick — the cake should come out clean when done.
- Eat warm directly from the orange peel with a spoon.
Mason Jar Dirt Pudding
This playful, no-cook dessert is a guaranteed crowd-pleaser, especially on family camping trips. Layers of chocolate pudding, crushed chocolate cookies, and gummy worms make it look like a little cup of garden soil — hence the name. It’s silly, fun, and genuinely delicious.
The best part is you assemble these at home, seal the jars, and keep them in your cooler until dessert time. Zero effort at camp, maximum enjoyment.
Serves: 4 | Prep Time: 10 minutes + chilling time
Ingredients
- 1 package (3.9 oz) instant chocolate pudding mix
- 2 cups cold milk
- 1 cup whipped topping (such as Cool Whip), thawed
- 20 Oreo cookies, crushed into fine crumbs
- 16 gummy worms
- 4 mason jars (8 oz size) with lids
Instructions
- In a large bowl, whisk together the instant pudding mix and cold milk for 2 minutes until thickened.
- Fold in the whipped topping until fully combined and smooth.
- Spoon a layer of chocolate pudding into the bottom of each mason jar, filling about halfway.
- Add a generous layer of crushed Oreo crumbs over the pudding to resemble dirt.
- Add another thin layer of pudding on top, then finish with another thick layer of Oreo crumbs on top.
- Press 4 gummy worms into the top cookie layer so they appear to be crawling out of the dirt.
- Seal the jars tightly with their lids.
- Refrigerate or keep in a cooler until ready to serve. Best eaten within 2 days.
Foil Packet Cinnamon Apples
If banana boats aren’t quite your style, foil packet cinnamon apples offer a similarly easy and satisfying experience. Apple slices, brown sugar, cinnamon, and a few pats of butter come together in a sealed foil packet over the fire, transforming into something that tastes remarkably like apple pie filling — soft, caramelized, and deeply warming.
Eat them on their own, or if you’re feeling ambitious, spoon them over oatmeal, pancakes, or even a plain cracker for a simple composed dessert.
Serves: 4 | Cook Time: 12–15 minutes
Ingredients
- 4 medium apples, peeled, cored, and sliced into ½-inch wedges
- 3 tablespoons packed brown sugar
- 1 teaspoon ground cinnamon
- ¼ teaspoon nutmeg
- 2 tablespoons butter, cut into small pieces
- 1 teaspoon vanilla extract
- Heavy-duty aluminum foil
Instructions
- Tear off four large sheets (about 18 inches each) of heavy-duty aluminum foil.
- Divide the apple slices evenly among the four sheets, piling them in the center.
- Sprinkle each portion with brown sugar, cinnamon, and nutmeg.
- Add a few small pieces of butter on top of each apple pile and splash with a little vanilla.
- Fold the long sides of the foil up over the apples and fold to seal. Then fold in the short sides to create a tightly sealed packet. Double-fold all seams to prevent leaking.
- Place the packets directly on hot campfire coals.
- Cook for 12–15 minutes, flipping the packets once halfway through with tongs.
- Remove from coals and let sit for 2 minutes before carefully opening — hot steam will escape.
- Serve directly from the foil packet or spoon into bowls.
Campfire Pineapple Upside-Down Cake
This one takes a little more effort, but the payoff is absolutely worth it. Pineapple rings caramelize on a base of butter and brown sugar inside a Dutch oven, and a simple yellow cake batter bakes on top. When you flip it out (or just scoop it), you get a gorgeous, tropical, sticky-sweet cake that feels like a serious achievement for campfire cooking.
It’s the dessert that earns you serious respect at the campsite. Make it once and you’ll be asked to bring it every single trip.
Serves: 8 | Cook Time: 35–40 minutes
Ingredients
- 1 can (20 oz) pineapple rings, drained (reserve the juice)
- ½ cup packed brown sugar
- ¼ cup (½ stick) butter
- 1 box yellow cake mix
- Eggs, oil, and reserved pineapple juice (substituted for water in the recipe) as directed on the box
- Maraschino cherries (optional, for presentation)
Instructions
- Prepare the cake batter according to package directions, substituting the reserved pineapple juice for the water called for. Set aside.
- Place the Dutch oven over hot campfire coals and add the butter. Let it melt completely.
- Sprinkle brown sugar evenly over the melted butter.
- Arrange the pineapple rings in a single layer over the brown sugar. If using maraschino cherries, place one in the center of each pineapple ring.
- Slowly pour the prepared cake batter over the pineapple rings, spreading it evenly to the edges.
- Cover the Dutch oven with its lid and heap hot coals on top to create top heat.
- Bake for 35–40 minutes, checking at 30 minutes. The cake is done when a toothpick inserted into the center comes out clean and the top is golden.
- Remove from heat and let rest for 10 minutes before serving — scoop directly from the Dutch oven or carefully invert onto a large plate if desired.
Chocolate Fondue with Campfire Dippers
Melted chocolate. Fruit, cookies, and marshmallows for dipping. A campfire. What else do you need?
Chocolate fondue is one of the most social desserts you can make, and at a campsite it becomes an event. Everyone gathers around the pot, conversation flows, and the chocolate disappears surprisingly fast. Use a small cast iron pot or heatproof bowl set near (not directly over) the coals to keep the chocolate warm without burning.
Serves: 6 | Cook Time: 10 minutes
Ingredients
For the chocolate fondue:
- 2 cups semi-sweet chocolate chips
- ½ cup heavy cream (or sweetened condensed milk as a camping-friendly alternative)
- 1 teaspoon vanilla extract
- Pinch of sea salt
For dipping:
- 1 cup fresh strawberries
- 1 banana, sliced into thick rounds
- 1 cup large marshmallows
- 1 cup graham crackers or shortbread cookies, broken into pieces
- ½ cup pretzel pieces
Instructions
- Set a small cast iron pot or heatproof saucepan on the edge of the campfire grate where the heat is gentle, not aggressive.
- Add chocolate chips and heavy cream to the pot.
- Stir slowly and continuously as the chocolate melts, scraping the bottom to prevent scorching.
- Once fully melted and smooth, stir in vanilla and a pinch of sea salt.
- Slide the pot to the coolest edge of the grate to keep warm without burning — you want it molten, not bubbling.
- Arrange all the dipping items on a board or plate in the center of your group.
- Use skewers, forks, or roasting sticks to dip and enjoy. Stir the fondue occasionally to keep it smooth.
Campfire Rice Krispie Treats
These are endlessly nostalgic and surprisingly fun to make over a campfire. You melt butter and marshmallows in a pot, stir in Rice Krispies cereal, press the mixture into a foil-lined pan, and let it cool. The result is the same chewy, crispy, sweet treat you’ve loved since childhood — made entirely outdoors.
They can also be made ahead at home and brought along as a no-cook option. Either way, they travel well in a zip-lock bag and make a great mid-day snack as much as a dessert.
Makes: 12 squares | Cook Time: 10 minutes + 20 minutes cooling
Ingredients
- 4 cups Rice Krispies cereal
- 1 bag (10 oz) regular marshmallows
- 3 tablespoons unsalted butter
- ½ teaspoon vanilla extract
- Pinch of salt
- Cooking spray or extra butter for greasing
- Heavy-duty aluminum foil or a small greased pan
Instructions
- Line a small baking pan or create a flat tray shape with heavy-duty foil and grease it well with cooking spray or butter.
- Place a large pot or cast iron pan over low campfire heat.
- Add butter and stir until fully melted.
- Add all the marshmallows at once and stir constantly over low heat until completely melted and smooth — this takes about 3–4 minutes. Don’t rush with high heat or they’ll scorch.
- Remove the pot from heat and immediately stir in vanilla and a pinch of salt.
- Add the Rice Krispies cereal all at once and stir quickly until every piece is evenly coated.
- Transfer the mixture to your greased foil tray and press into an even layer using a buttered spoon or your hands (greased with a little butter to prevent sticking).
- Let cool for 20–30 minutes until set and firm before cutting into squares.
Chocolate-Stuffed Marshmallows
The simplest idea on this list might also be the most satisfying. Take a large marshmallow, cut a small slit in the side, tuck in a piece of chocolate, and roast it over the fire. As the marshmallow toasts and puffs, the chocolate inside melts completely. One bite gives you molten chocolate wrapped in a warm, caramelized shell.
It’s s’mores in a single bite — no cracker, no assembly, no mess. Perfect for those moments when you want something sweet but don’t want to fuss.
Serves: 4 | Cook Time: 3–5 minutes
Ingredients
- 12 jumbo marshmallows
- 1 chocolate bar or ½ cup chocolate chunks, broken into small pieces
- Optional fillings: caramel bits, peanut butter chips, hazelnut spread
- Roasting sticks
Instructions
- Use a small knife or your fingernail to carefully cut a small slit into the side of each marshmallow, about halfway through — don’t cut all the way through.
- Press one small piece of chocolate (or a caramel bit or peanut butter chip) firmly into the slit inside the marshmallow.
- Pinch the opening of the marshmallow closed around the filling as much as possible.
- Skewer the stuffed marshmallow onto a roasting stick, inserting it from the bottom so the slit faces up and the filling stays inside.
- Hold over campfire coals (not flames), rotating slowly and steadily for 3–5 minutes.
- The marshmallow is ready when it’s deep golden brown on the outside, puffed up, and slightly wobbly — the chocolate inside will be fully melted.
- Slide off the stick carefully and eat in one bite for the full molten effect.
Tips for Stress-Free Camping Desserts
Prep as much as possible at home. Chop fruit, pre-mix dry ingredients, portion toppings into small zip-lock bags, and pre-make anything that doesn’t need to be fresh. Arriving at camp with everything ready to go means more time enjoying and less time fumbling around.
Heavy-duty foil is your best friend. Standard aluminum foil can tear over hot coals. Always use heavy-duty foil for campfire packets and wrapping — it holds its shape, seals better, and won’t let your dessert fall into the fire.
Control your heat. The most common campfire cooking mistake is cooking over active flames. Coals are far more effective — they provide steady, even heat without the flare-ups that burn the outside before the inside is cooked. Let your fire burn down to glowing coals before cooking.
Bring the right tools. A Dutch oven, a cast iron skillet, long-handled tongs, and a good set of roasting sticks will cover almost every dessert on this list. These items are worth the weight in your gear bag.
Don’t forget the little extras. A small container of flaky sea salt to scatter over chocolate, a squeeze bottle of honey, or a packet of instant whipped cream can elevate any camping dessert from good to genuinely memorable.
The best camping desserts aren’t complicated — they’re the ones that bring people together around the fire, spark a little joy, and turn an ordinary evening in the outdoors into something worth remembering. Pick a few favorites from this list, pack your ingredients, and get ready to make some sweet memories.


